Tag Archives: beekeeping

Making Fondant for Your Bees

A new bee colony is like a small child. When it first shows up you are nervous as heck to hold them; you spend a good amount of time feeding them with little thanks; you worry about their safety and well-being and when it comes time to say good-bye to them (for the winter months), you want to make sure they are well fed and going to stay warm. After an entire summer of caring for and checking on your hive, it would be a terrible waste and huge bummer to come back in the spring and find that your bee-kids didn’t have enough food to get them through the winter months and you are left with an empty hive.

But it doesn’t have to come down to that! You don’t have to come back in the spring to find that your bees starved through the winter and didn’t make it. By taking just one final step of caring for them before saying goodbye for the winter, you can help ensure they make it through the cold, barren months. If you started the spring with a brand new colony of bees, you are probably no stranger to feeding them sugar water to get them through the slow start of spring and summer. Unfortunately with cold weather, the less you disturb your colony the better, not to mention that sugar water freezes in the winter! So what is the better winter solution? FONDANT! Not the fancy, expensive stuff you put on your cakes – the homemade kind. What you would expect out of a homesteader J

As I have mentioned in past posts, our queen bee was not doing her job all summer and our hive had barely produced any honey for them to live off of for the winter. Ideally you want to have 2 hive bodies filled with sugar plus a smaller honey super to get them through the winter. Our hive didn’t even have 1 full hive body. Not good at all. While we have had a top feeder on our hive for the last few months providing them with up to 1 ½ gallons of sugar water at a time (so long as it wasn’t cold enough to freeze), there still wasn’t enough stored honey to make us feel comfortable leaving them for the entire winter. Once winter comes around and temperatures are cold, you cannot get into your hive at all. Any extra stress, or blasts of cold air would definitely not help their survival.

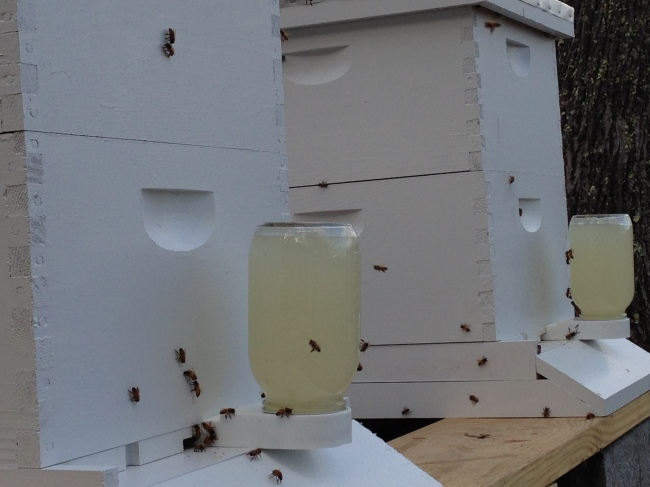
Top feeder - where the bees can access 1.5 gallons of sugar water at a time from inside their hive.

Top feeder – where the bees can access 1.5 gallons of sugar water at a time from inside their hive.

In the end I referenced a few different sites, taking bits of information from each of them to create my recipe.

http://www.bamboohollow.com/fondant-recipe.php

How to make fondant for bees from table sugar

Click to access bee_candy.pdf

http://www.colonialbeekeepers.com/index.php/faqs-mainmenu-25/76-how-to-make-fondant

The basic recipe is:

  • 4 parts sugar:1part water
  • ¼ tsp vinegar for each pound of sugar
  • Honey B Healthy

You will also need:

  • A large pot (we used a large turkey fryer pot)
  • A long handled spoon to stir with (splattering boiling liquid sugar on your hands is not a good time)
  • Accurate thermometer (this has always been the most frustrating thing for me. I have 4 different thermometers in my house and they all read different)
  • Hand mixer – a paint stirrer that attaches to a drill is ideal
  • Some time – depending on the size of your batch it may take a while for everything to come to temperature
  • Necessary ingredients: Sugar, vinegar, large pot and Honey B Healthy.

    Necessary ingredients: Sugar, vinegar, large pot and Honey B Healthy.

Some good tidbits of information:

  • 1 quart of water weighs approximately 2 pounds
  • The mixture should come to an initial boil at approximately 220 degrees

Since we needed so much fondant for our hive, we filled out top inner cover and 1-side of 6 super frames. For this we used 16 lbs of sugar and 2 quarts of water. We also used a turkey fryer outside in our barn to help keep down on extra steam in the kitchen…plus we just happened to be out there working anyway.

Directions:

  • Add the water to the pot and slowly add the sugar while stirring (the heat can be on at this point).
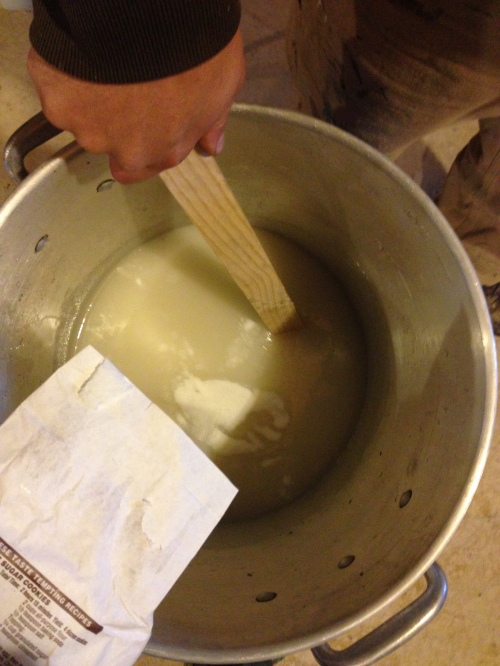
Slowly add the sugar to the water while mixing.

Slowly add the sugar to the water while mixing.

  • Add 1/4 tsp of vinegar/pound of sugar. This helps the sugar not crystallize too much and stay smooth. It also helps convert the sugar from sucrose into a glucose structure which is better for the bees.

Photo Dec 13, 1 13 36 PM

  • Bring to a boil while stirring often to make sure it doesnt stick and burn – this took us a little bit of time (but we were also using our turkey fryer with a really low tank of propane)
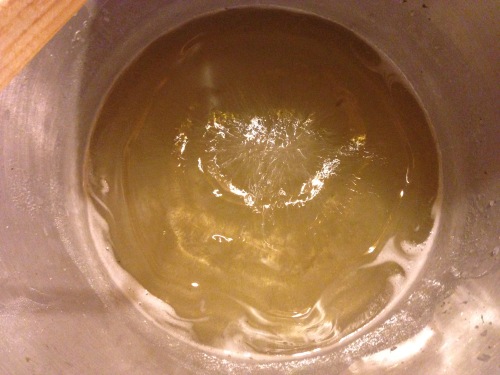
  • It should start to boil at around 220 degrees and turn clear.
Once the mixture comes to a boil it should turn clear.

Once the mixture comes to a boil it should turn clear.

  • Keep boiling until the water evaporates off and the temperature is 234 degrees (remember back to high school chemistry: Water with a higher concentration of particles in it (eg – sugar) has a higher boiling point and lower freezing point).
  • Cool the mixture down to 200 degrees – luckily we had a bunch of buckets outside collecting water which were half frozen – we dumped that water into a wheelbarrow and placed the metal pot in the water and it took no time to cool our mixture down. Keep stirring as the mixture is cooling down as it will begin to thicken.
  • Add the Honey B Healthy. I didnt know how much to add. There was only 1 site that mentioned using it and it said 1 cup/5 lbs of sugar which seems a little over the top considering you only use ½ tsp per gallon of sugar water in the spring and fall. Overall I added about 2 tsp for my entire batch.
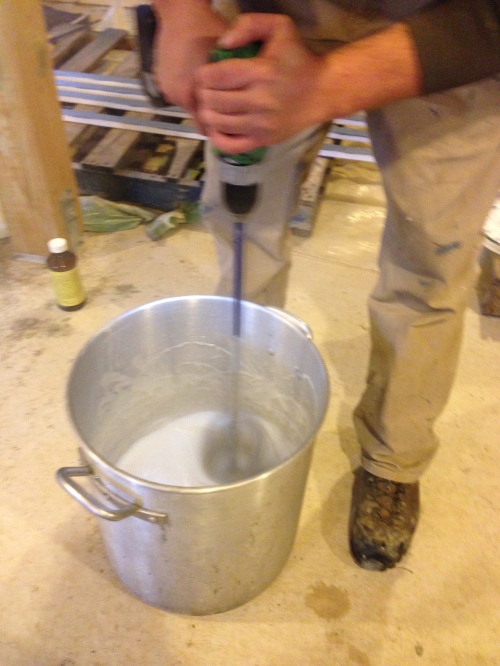
  • Use the hand mixer or paint stirrer to whip the mixture. It will turn white and get thicker – it will also be cooling down as you do this.
Whip it.

Whip it.

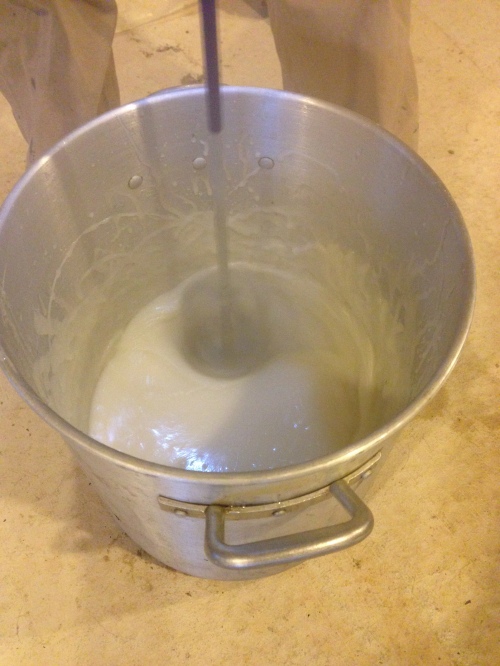
Whip it good!

Whip it good!

  • Whip it until it is relatively thick. You want to be able to pour it but don’t want it slopping all over the place. It will cool pretty quickly once you start to pour it out. By the end my husband and I were using our hands to scoop it out and mold it into the last few frames.
Finished fondant on the inner cover and 2 frames.

Finished fondant on the inner cover and 2 frames.

  • Let the fondant cool and place in your hive when the weather is good.
The bees are already testing out the fondant on the inner cover.

The bees are already testing out the fondant on the inner cover.

The whole process is not too hard, just sort of time consuming while bringing it up to boil. We made sure that the frames were on top of wax paper so it didn’t make a mess, but the mixture was so thick we didn’t have too much leak out the cracks. Also make sure that you put some tape over the back side of the inner cover hole until the mixture cools, then you can punch out the hole so the bees can still crawl through and to help with ventilation. As another measure of precaution, we left our top feeder on the hive as well. While the sugar water in it may freeze over the winter, if there are warm days, it will melt and provide extra food for them. The top feeder is also nice because less cold air can get into the hive if you lift off the cover to fill the feeder quick.

And so now our waiting game starts. It won’t be until sometime in the spring that we are able to get into our hive and see if they survived through the winter; but at least if they don’t it wasn’t for lack of trying on our part.


Operation Bee Move: Success

Have you ever had that moment when you feel like you have failed as a parent or pet owner? Not necessarily something huge like you forgot to pick your kid up from soccer practice and finally remembered 3 days later, or you strapped your pet carrier on the top of your car while on a cross country trip. I mean more like, “Holy crap, that could have been bad…” That’s how I felt a few weeks ago. After we had set up our bees and they were happily buzzing around pollinating plants and building their honeycomb, we got a huge freak storm. For over an hour it POURED rain, hail and all. The small creek that cuts through our property jumped its banks and rose close to 4 feet. Our driveway was underwater, as was most of the front field – this front field, where our precious (and expensive) bees resided.

Two bee hives nearly flooded.

Two bee hives nearly flooded.

View of our two hives almost swimming in the creek.

View of our two hives almost swimming in the creek.

By the time the rain stopped and we went to investigate the damage of the storm, we found, to our horror, that the creek was 6” from the bottom of our bee boxes! Luckily the creek subsided as time went on and they stayed dry. When the water went down enough for us to get over to them, they were still flying in and out; they hadn’t bailed ship thankfully.  The metal tops of the boxes were riddled with dents from the hail, but that was the extent of the lasting damage. We needed to move those bees ASAP. However, our neighbors who own the other bee box were on vacation for a few days and we needed to wait until came back so we could have some extra hands. And of course, more rain was in the forecast. Two days after the flash flood they were calling for another inch of rain to add to our already saturated ground. I spent the entire day at work worried our bees were being swept downstream. But they weren’t. The creek went up again, but nothing like during the flash flood.

Dents on the hive cover from the hail.

Dents on the hive cover from the hail.

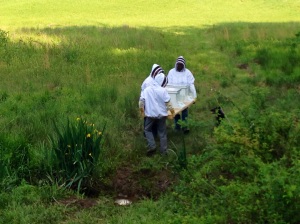
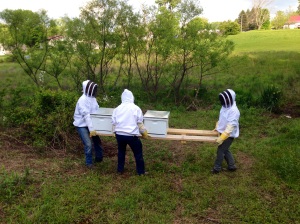
A few days later our neighbors were back, and our other neighbor, who was planning on getting a third set of bees for The Compound bee colony, had finally received his bees in the mail. Perfect timing and excuse to get the other hives moved and set up before adding an additional hive. We all decided on another location behind the blueberry patch, on higher ground and still out of the way. Since all together we only have three bee suits for the five members of The Compound, the boys geared up and went to retrieve our bees from the other side of the creek. The scariest part of the whole ordeal wasn’t that they were carrying a large board with two bee boxes perched on top while bees angrily and confusedly flew all around them; it was when they had to cross the creek which had super muddy banks (especially after all the rain) and a steep drop off into the water. Who was going to slip and eat it while carrying all those bees? No one. Thank God.

The boys are gearing up for the move. Notice there is no standing water anymore.

The boys are gearing up for the move. Notice there is no standing water anymore.

Nearing the treacherous creek crossing.

Nearing the treacherous creek crossing.

Photo May 22, 6 31 39 PM

The bees new home.

The bees new home.

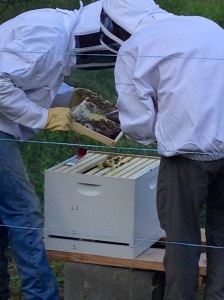
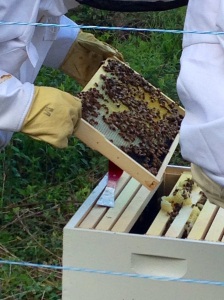
After the boxes were set in their new homes, Scott went to start setting up his new hive while my husband and Donnie went into the two original hives to check on them. Since the time we had made sure the queen bee was out of her box, we hadn’t gone into the hives at all to check on them. We wanted to give them some time and space, and let the queen start putting those other bees to work while she laid her eggs. In one of the hives we found the queen bee right away; we never came across her in the second hive. There were a few frames in each hive filled up with pollen and honey comb; not as many as we were hoping to see. Since all the bees were flying around and already stressed from their move, we didn’t want to poke around too much, but from what we saw, there weren’t many, if any, eggs laid yet. This weekend we will go back in and check on them again.

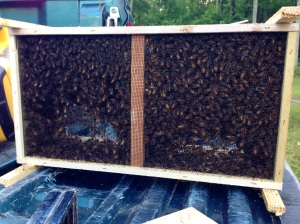
Third set of bees ready to be inserted into their new hive.

Third set of bees ready to be inserted into their new hive.

Photo May 22, 7 01 53 PM Photo May 22, 7 03 03 PM Photo May 22, 7 03 26 PM

Queen Bee! She is located near the center top of the frame.

Queen Bee! She is located near the center top of the frame.

So far the bees seem to like their new home. I am not sure if we lost any due to the move. After they were all moved and we closed the boxes back up, my husband and Scott went back to their original location and found a decent sized swarm of bees flying around the old location. We are guessing they are bees that were out foraging when we moved them and didn’t know where to go. The guys found that if they stood there for a few minutes, the bees would land on them and then they could slowly walked them over to their new location (on one of the trips Scott did slip on the muddy bank…better then and not while carrying the hives 🙂  ). So now our bees are high and dry; more flowers are blooming for them to forage from, and hopefully the queen is making more bees to increase our healthy hives!

Bee butt getting some raspberry plant pollen.

Bee butt getting some raspberry plant pollen.

Queen Bee and Happy Hives   

It has been 1 week since our busy little bees got mailed to us and they seem to be quite happy in their new Mountain State home. In my last post I might have been a little too excited and over exaggerated saying there are 200,000 bees in our boxes. I didn’t mean to lead you all on, I was just so excited for out bees! I should have used a word more like “shmillion” which usually accompanies my over-exaggerations. Truth is, each of our hives started with about 10,000 bees when they were mailed to us (in the middle of each summer, when the bees are the busiest storing up pollen and honey for the winter months, the hives can have up to 80,000 bees in them). Can you blame me for being so excited though? I have wanted bees for a few years. In fact (I feel like such a little kid admitting this), my parents gave me some birthday cash last year and I have been saving it, sitting on my dresser, since last July waiting for the right time to buy some bees. I am pretty excited!

Image

Three days after we received our package of bees and set them in our hives, we went to double check that they queen bee got out of her special little box. When sets of bees get sent out to individuals starting a new hive, it’s not usually as simple as packing up a whole hive and calling it good. Bee suppliers split the hives they have into multiple packages and send those off giving them the biggest bang for their buck and allowing them to keep sets of bees themselves so they can continue to “harvest” them and make a business. But remember, a hive needs a queen, and you can’t split her. Instead they allow queen eggs to hatch and ship them off with one part of the split hive (a queen egg, or “cell”, is much larger than that of a drone or worker bee, making it easy to distinguish. Usually queen cells are picked off and not allowed to hatch since there can only be 1 queen per hive). Since this queen bee is different from the one the bees in the hive had before, she has to be kept separate until they get used to each other and can become a happy hive. It also helps ensure that she survives the stress of being shipped. When you get a package of bees, the queen (and usually a few helpers) is in a small, separate box with a small piece of sugar candy blocking her exit. This little box is placed inside the hive until she is set free by the bees (or the bee keeper in some instances). Over a few days’ time, while getting used to each other, this piece of candy is eaten away and then she is free!

Image

The Queen and her helper bees in their separate box.

Image

Taking the queen box out to check if she got out.

Image

Empty Queen box!!

When we went to make sure that the queen in each hive was released, we found in each hive an empty box with no queen. At this point some people take out each frame in the hive to double check that the queen is there. Inexperienced as we are, we felt it best to leave the bees alone and not stress them out while we would inevitably spend much too much time picking up each frame and poking around for the queen that our untrained eyes have yet to master finding. Instead we will go back in a few weeks to check on them and see if there is brood (baby bees) being laid. If there aren’t any, then we know the queen either did not survive or is a very weak queen. If this is the case we have to get a new queen ASAP, or risk the bees swarming (leaving their hive in search of a new home and queen).

Honey comb created over 3 days time around the area where the Queen box was.

Honey comb created over 3 days time around the area where the Queen box was.

Our first piece of honey comb, attached to the queen box.

Our first piece of honey comb!

But for now we will assume that the queens are in place and laying and expanding our hives while the busy worker bees keep building honey comb and collecting pollen.

This will bee the start to our honey production….

One of my favorite snacks as a kid was toast with honey. My family had a huge honey jar in the middle of our kitchen table that I would sneak finger swipes from when no one was watching. Honey was a constant in our house. My mother cooked and baked with it. It wasn’t until high school that I realized putting honey in your coffee like my father did was not the norm. Like much of the amazing things my parents did when I was a child, I took for granted and didn’t pay nearly enough attention to what was there. I only have vague memories scattered through my childhood of some of my parents earlier homesteading projects and don’t remember much of what it was like having bee hives in the back yard, or baby goats running through the pasture, or, as mentioned before, tapping the maple trees in our front yard. While a lot of what my husband and I are doing should be second nature to me from my upbringing, I am learning a lot along the way while waking up those very distant memories and brushing the cobwebs off of them.

This week “The Compound” is starting our newest journey into self-sustainability. We are getting bees!! This area has a strong bee keeping community with lots of years of experience and willingness to share. In an effort to bolster new beekeepers in the area, one local fellow, John Brenemen, has been holding small workshops at his home on Monday evenings. He is also the president of the Fayette County area beekeepers association and the new president of the Fayette County Farmers Market. In another effort to encourage beekeepers in the area (and I think just for the fun of it too), John builds all the wooden bee equipment needed right in his backyard. And by build all the wooden equipment, I mean he has a huge building with stock piles of materials for people to buy – both handmade wooden supplies as well as any other general tool, food (yes, bees need to be fed sometimes in the slow pollen seasons) and clothing (think fun beekeeper suits). He says he doesn’t make much money, if any, off of these supplies, but by having them on hand, and keeping the source local, it is easier for all of us other beekeepers when we are in a bind and need more materials.

After forking over a chunk of change for our initial supplies the other night, the five members of the Compound glued, assembled, nailed and painted all the wood pieces that John had painstakingly cut for us. The paint and glue have dried, the rain that has swept over the state has stopped (bees do not like rain) and our bees will be waiting for us to pick them up tomorrow….yep they get shipped right to us, and believe me when I say the Post Office is very willing to let you pick them up as soon as you can! Pictures, and hopefully a success story, later on after the installation of the bees to their new home. Image

Image

Image

Image